Applying make-up is a form art in itself; to be able to beautifully sculpt, contour and highlight a face is both a pretty challenging and satisfying thing to do. But before we get there, we have to start somewhere.
So while we’re off fantasising about how we will one day be so on fleek with our contouring game (I constantly watch an incessant amount of make-up videos so you’re not alone), here’s a bit of a make-up 101 for anyone looking to start on make-up, but is not too sure what the whole game is all about.
The bare essentials you’ll need, the type of foundation or BB cream or CC cream or whatever weird cream you need for your skin type – I’ll try to help you solve all that. Go forth my friends, be on your way to slaying big time.
1. Cleanser
It’s really important to cleanse your face properly to prime it for make-up. Remember this: clogged pores are your worst enemies and piling make-up on top of that is a big no-no.
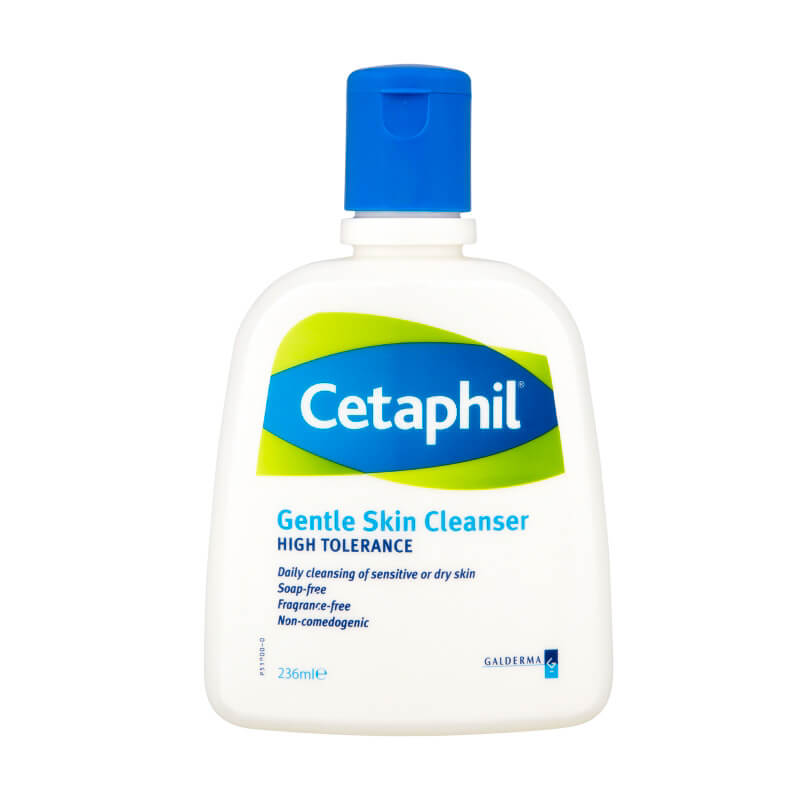
Cetaphil 1 Litre (S$39.50)
Identifying your skin type and getting the right kind of cleanser is really important as well. Oily skin needs an oil-control or oil-free cleanser and vice versa. If you’re someone with oily combination skin (like myself), then get a gentle cleanser for all sensitive skin types.
I’d recommend using Cetaphil. It’s gentle, foam-free and soothes the skin as it cleanses it.
2. Moisturiser
Use a toner to tighten your pores after cleansing, then moisturise your skin well. Pat lotion gently on your face for more efficient absorption. Wait for it to be thoroughly absorbed and your face is now ready as a canvas.
3. Primer
I hadn’t really used a primer till recently, and I didn’t notice much of a difference. BUT I’ve had people tell me how primers help to blur their pores, mattify their faces and allow for foundation to be more easily applied and last longer.
Squeeze a pea-sized bit, apply it all over your face starting from the centre to the ends. Get one that’s lightweight and non-greasy.
4. BB/CC Cream or BB Cushion
If you’re looking for more coverage, head straight to a cream or liquid based foundation. For starters, a BB or CC cream would be sufficient. So what’s the difference between these two creams?
A blemish balm (BB) functions as an all-in-one balm – primer, foundation and sunscreen. It’s usually tinted and lightweight, with a pretty sheer finish.
A CC cream contains all of that with an added feature of colour correcting, hence the name. CC Cream is a tiny bit lighter than a BB cream and is targeted at reducing sallowness, redness or dull skin.
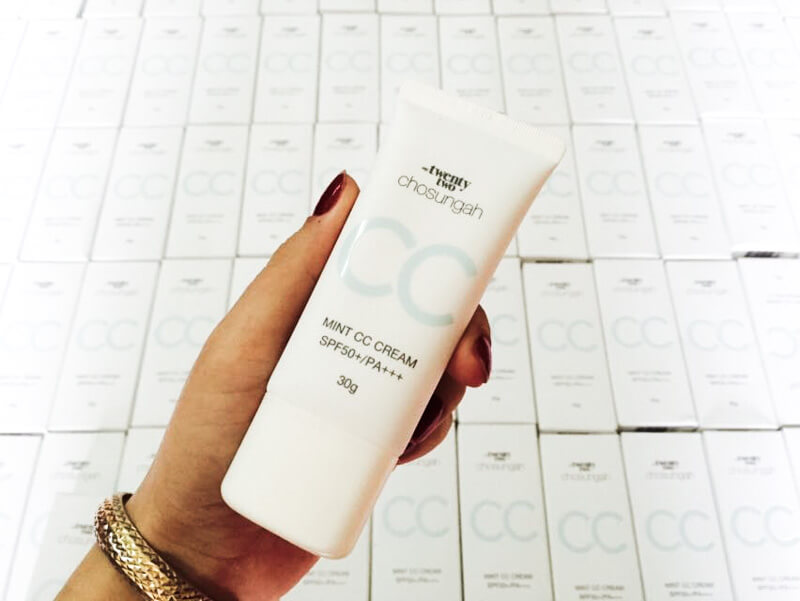
Chosungah22 CC Cream (S$43)
So it really boils down to what sort of coverage you’re looking for, or what problems are you targeting at. If you’re more concerned about your blemishes, then the former is for you.
If you’re more concerned about your skin looking too dull, then maybe a mint CC cream is for you. The CC Cream from Chosungah22 is pretty good and you can get it from most SaSa stores in Singapore.
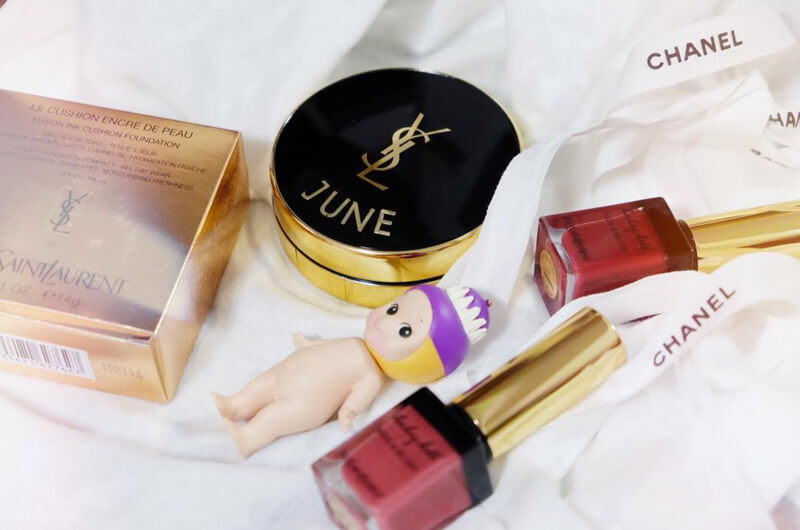
YSL Le Cushion Encre De Peau (S$88)
There’s yet another alternative out there, the BB cushion. Falling in between a BB cream and a full fledged foundation with regards to coverage, it comes soaked in a sponge cushion, and you just dab it all over your face with the applicator provided.
I’d recommend the YSL’s Le Cushion Encre De Peau or Laneige’s BB cushion.
5. Eyebrow Pencil
A strong pair of eyebrows is all the rage now but for first timers, sculpting and drawing eyebrows might be a daunting task, let alone shading them.
Instead of all that and if you have a rather full eyebrow already, why not opt for a tinted eyebrow mascara gel that helps to fill in the empty areas. It also brushes the mane, keeping it set in place as the gel dries.
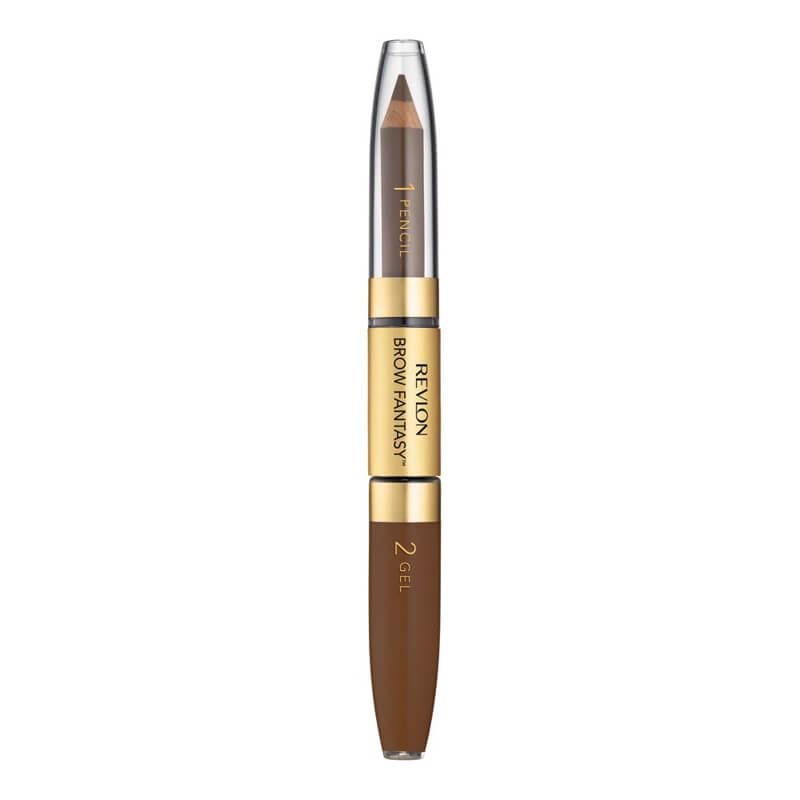
Revlon Brow Fantasy Pencil & Mascara (S$11)
I’d recommend getting Revlon’s Brow Fantasy Pencil & Mascara, that way you can fill in your eyebrows with the pencil whenever needed and set it with the mascara. Or if you’re too lazy, just set it with the mascara.
Use an eyebrow brush to lightly diffuse the pencil or mascara, to create a more natural effect.
6. Concealer
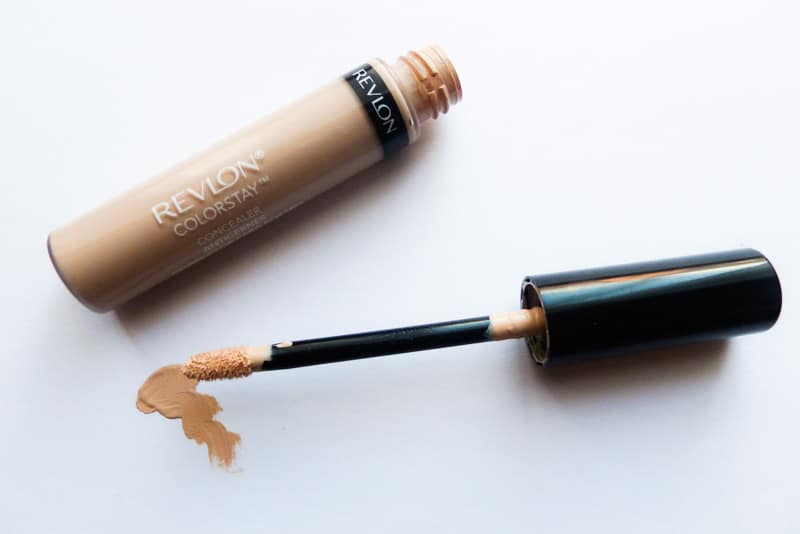
Revlon ColorStay Concealer (S$20.90)
If you’re okay without concealer, you can just skip this step, but it’s mostly for under eye dark circle correction. Revlon’s ColorStay Concealer is affordable and works pretty well.
Dab an inverted triangle under your eye and slowly blend it out using your fourth finger. Only a small amount is needed as it might get a little too sticky if applied in abundance. Let the concealer set a little before deciding if it requires a second coat.
7. Eyeliner
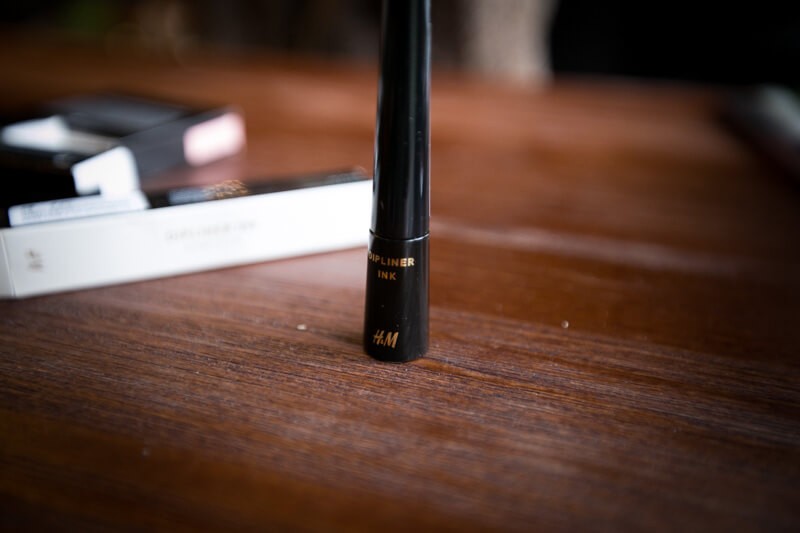
H&M Eyeliner (S$9.90)
Get a really thin liner that follows your eye lid for a more natural look, but I promise you that chances are you won’t get it right on your first try. You might end up looking like a panda and you’ll wonder how people do it so effortlessly.
I’ve been there, done that and all I can say is, practice makes perfect.

If you’re into the thin liner look, go for a felt liner tip or a really, really thin liquid eyeliner. This allows for easier application and control as to how fine the line is.
I’d recommend H&M’s liner which is cheap and rather thin, with jet black application.
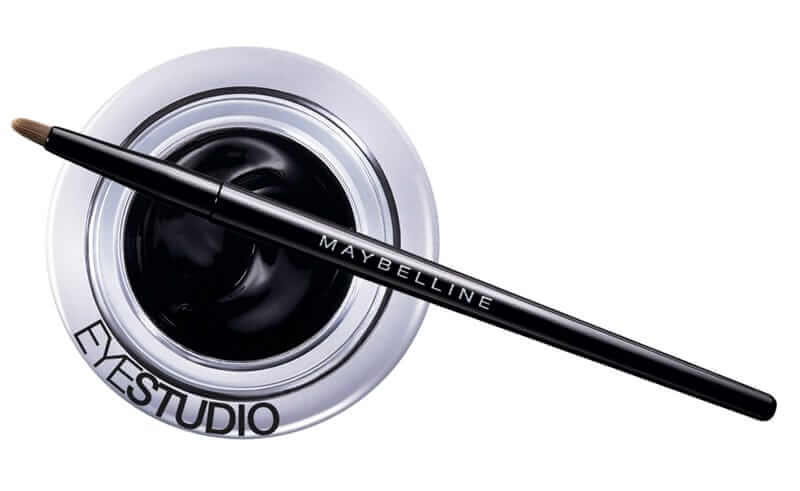
Maybelline Eye Studio Lasting Drama Gel Liner (S$22.90)
If you’re into a thicker liner, try for a gel liner as it’s more opaque and intensely black. Maybelline’s Eye Studio Lasting Drama Gel Liner is a good liner to start practising with.
A brush is provided and all you have to do is extend the winged liner towards the end point of your eyebrows.
8. Mascara
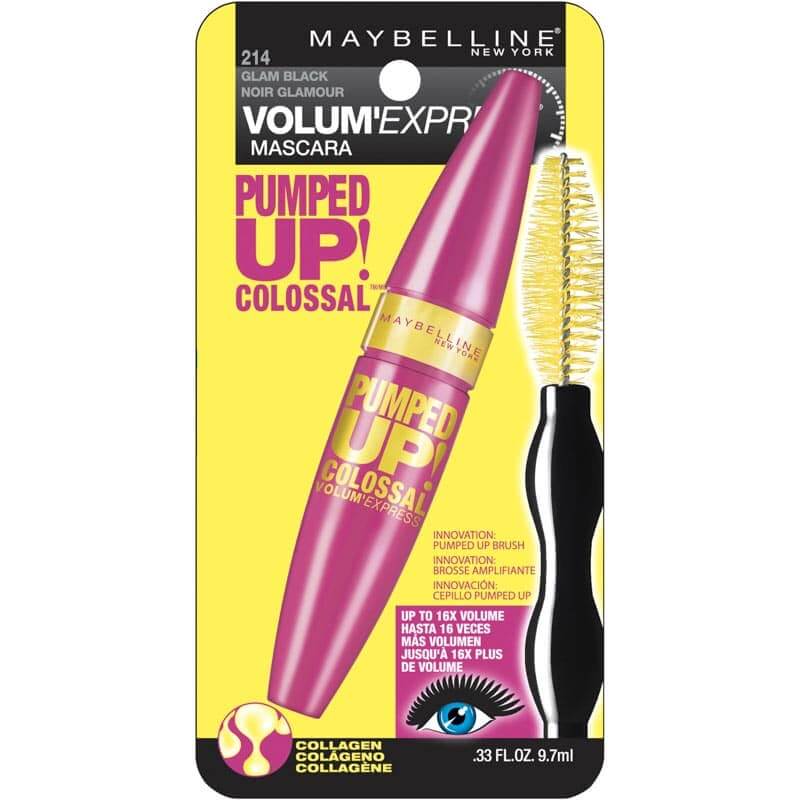
Maybelline Volume Express Pumped Up! The Colossal Mascara (S$19.90)
Skip the eyeliner if you’re too lazy and just stick to a great mascara. It gives a natural look – you know, that whole nude make-up thing. If you already have long lashes, you’ll probably want to get a mascara that builds volume.
Maybelline’s Volume Express The Colossal Mascara is a good and affordable mascara to experiment with. Instead of getting an eyelash curler, simply use the eyelash wand to push your lashes upwards during application and hold it in place for a minute. Repeat for three coats and that should do the trick.
If your lashes are on the shorter side, pick a mascara with fibres that will cling onto your natural lashes during application. My favourite has definitely got to be Deja Vu’s Fibrewig (S$25.90).
It really extends your lashes dramatically and you can find it at any SaSa make-up store.
9. Blush or Bronzer
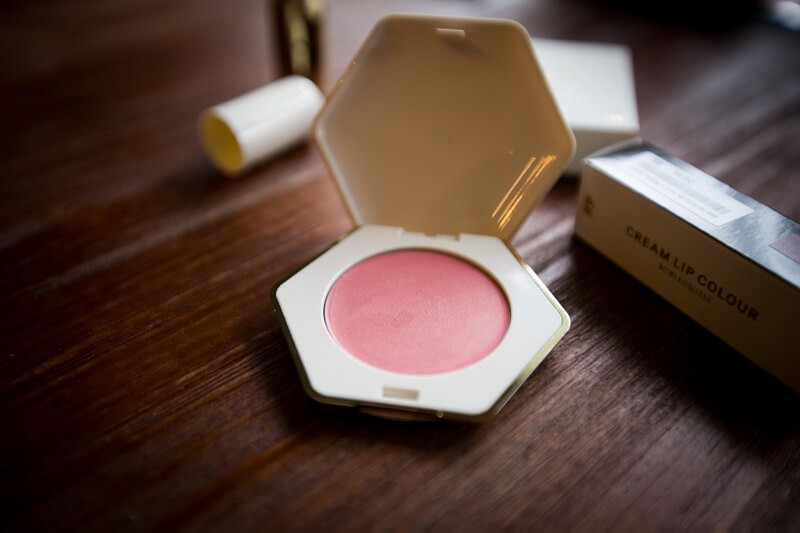
Once again, this step could be skipped but for more defined cheeks, dab a little blush for that cute look. Or get a bronzer for your cheek bones; suck your cheeks in and apply the bronzer along your cheek bones to create that defined illusion.
10. Lip Balm or Lip Tint
You’ll be surprised at how chapped your lips can get even in a tropical country that is so humid. Protect your lips by applying a thin layer of transparent balm or tinted balm. Either way, you’re good to go!
I hope this list of bare essentials will give you the courage to embark on the most wondrous journey of all, and when you finally get the hang of it, you can start experimenting with eyeshadow, highlighter, contouring etc.
Baby steps my friends.
Author
Get the latest updates by following us on Twitter @hypeandstuff & Facebook Have an interesting story to share? Email us at [email protected]